


Most Walking boots these days will last a very long time, but with a bit of extra care, you can make them go on for even longer. And given that boots aren’t cheap, then its a no brainer.
I know people that have had the same pair of boots their whole life. It’s because they just give them a few minutes of care every now and again.
It is a fairly quick process to get your boots like new again and it is up to you how often you do it. If you come back from a quick walk on a dry summers day then you probably won’t need to do anything to your boots. However, if you have been out on a winters day or an expedition then you would probably want to wash them. Similarly, if you haven’t done them in a while and there is a buildup of dirt then you should clean them too.
1. Clean your boots
First off is to clean your hiking shoes.
The best way to do this is under a gentle warm tap. Get a soft/medium stiff brush and scrub off all the excess dirt. Try not to get too much water inside the shoe as it will take longer to dry out.
If you know you are going to wash your boots then help yourself out by giving them a clean while they are still on. Walk through some puddles or long grass to help take the excess mud off. giving them a quick spray with a hose will also help you later on.
Do not use Detergent
Wash all around the boot to get it nice and clean, being careful not to damage the shoe at all. You can start to lose the shape of your shoe if you bend or stretch the boot in abnormal ways while cleaning.
2. An extra scrub
Not an essential step but ideal for that extra shine!
After washing under a tap, once your boots have dried a little you will gradually see bits you have missed. Just like when I was a car.
Grab a bowl of warm water and a cloth, then start cleaning away at all those little bits under the laces.
3. Let your boots dry
You boots will probably still be wet from hiking and cleaning them just now. It is best to let your boots dry before adding any treatments or waterproofers.
Never force your boots to dry. Things like leaving your boots by a fire or on a radiator can damage both the glues that hold the boots together and damage the material or crack the leather.
Let your boots dry naturally. Stuff newspaper into the boots and change it regularly to help dry out the inside quicker.
4. Waterproof your hiking boots
Next step is to waterproof your boots. The best way to do that is to get a purpose made waterproofer like this Nikwax leather and fabric proofer.

Get some of this stuff or a suitable alternative and follow the instructions. It’s as easy as spraying on the solution, waiting a few minutes and then wiping off the excess.
Your boots will be good as new in now time.
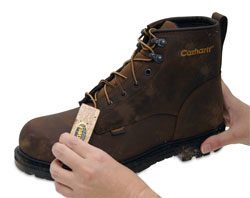
5. Extra steps to clean leather boots
Clean your boots like above.
When you waterproof your leather boots it is recommended that you spray the solution on while still wet with leather boots, i.e just after cleaning. It still works when done dry but it just works better while wet.
Over time leather deteriorates and can dry out leaving the leather cracked and not very waterproof.
There are many products you can use to do this but once again I recommend Nikwax Leather conditioner
By applying this you will restore the suppleness of the leather, add moisture to the leather, restore and re-waterproof the boot.

If there is anything else you recommend, let us know in the comments.
